How to DIY a veggie planter from an old clothes rail
 We're often too quick to throw things out! But often there is still life left in things and with a bit of creativity we can often repurpose or reuse items that we find around the house. Thus, saving it from ending up in landfill This is exactly what Cassie Fairy, possibly the thriftiest person you will ever meet, did with this old set of drawers and a clothes rail turning it into a one-of-a-kind tomato planter.
If you fancy growing your own vegetables in your garden, this project provides the ideal spot for tomatoes, peas or runner beans. The old clothes rail creates a frame for climbing veg to grow up, and offers support to keep fruiting plants upright. You can use an old planter as the base or, if you’ve got a broken chest of drawers like we have, you could use one of the drawers as an alternative planter that looks rather quirky. It can be positioned on a patio, decking or in a courtyard garden. Plus, you can use the wheels on the hanging rail to move the planter around the garden to position it in a sunny spot before adding your plants!
You will need:
- Old hanging rail
- Old drawer or wooden planter
- Offcuts of thick timber
- A longer piece of narrow timber for the top
- Corner brackets
- Wood screws
- Screwdriver
- Tank cutter or hole saw
- Drill
- Sandpaper
- Wood stain or outdoor paint
- Eye hooks
- String or wire
- Staple gun and staples
- Compost
Step 1
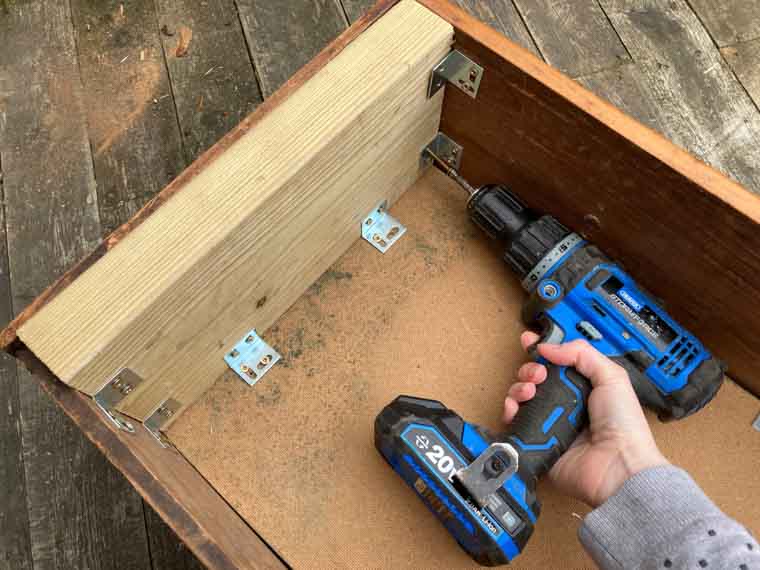
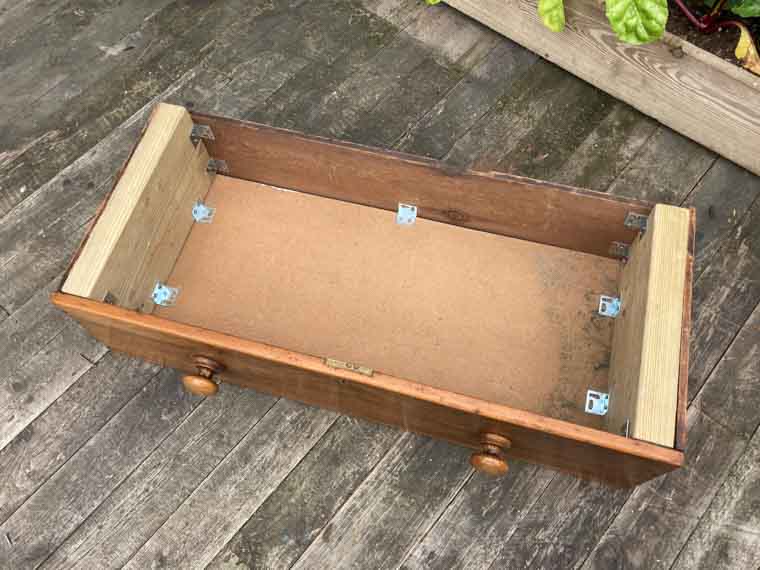
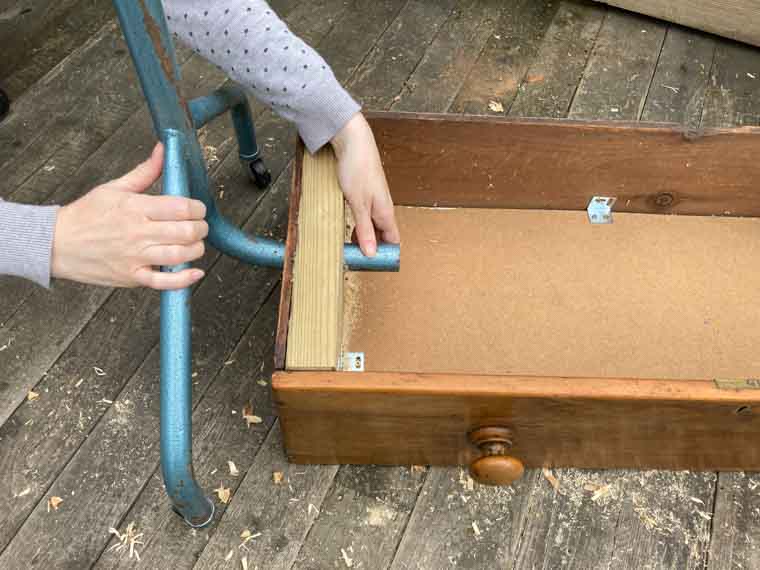
If you’re using a broken drawer, reinforce the sides with a thicker offcut of wood. Screw the timber in place with small corner brackets and add a few brackets to the base for extra support.
Step 2
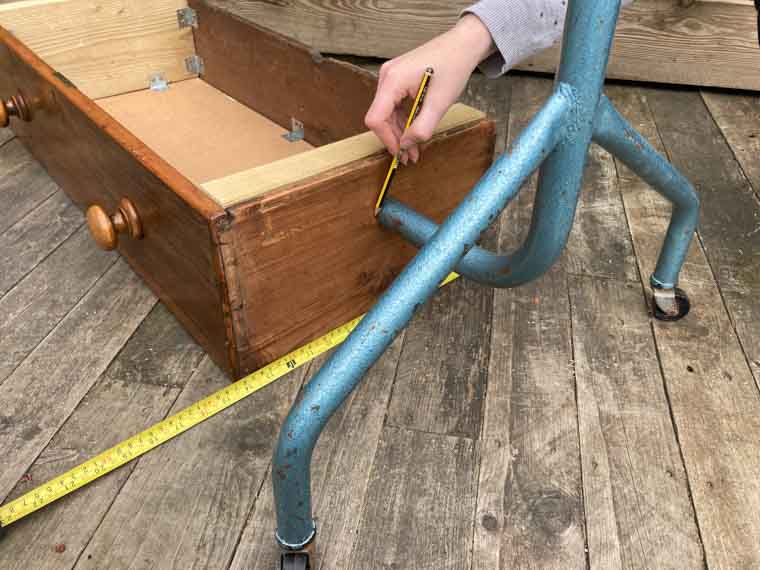
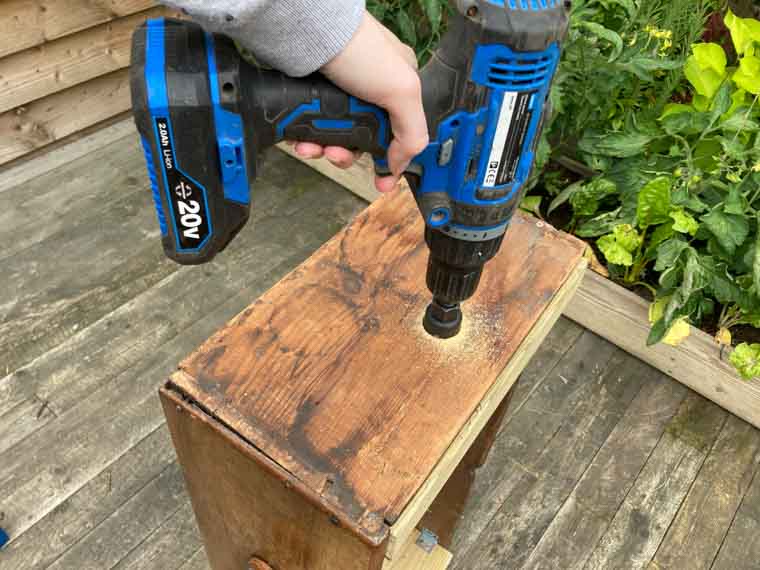
Position the hanging rail at the end of the drawer or planter. Measure to ensure that the pole is in the centre and draw around it with a pencil. Use a tank cutter or hole saw that is the same diameter as the pole to drill a hole in each end of the planter/drawer.
Step 3
Push the side uprights of the hanging rail into the holes at each end of the planter. Either add the original rail across the top or, if the dimensions of your planter are narrower than the rail, measure across the top between the two uprights and cut a piece of narrow timber to fit this distance.
Step 4
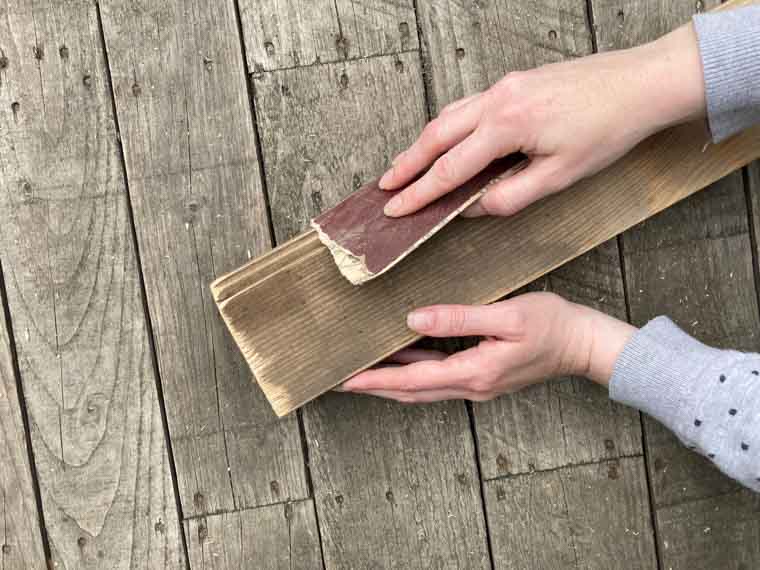
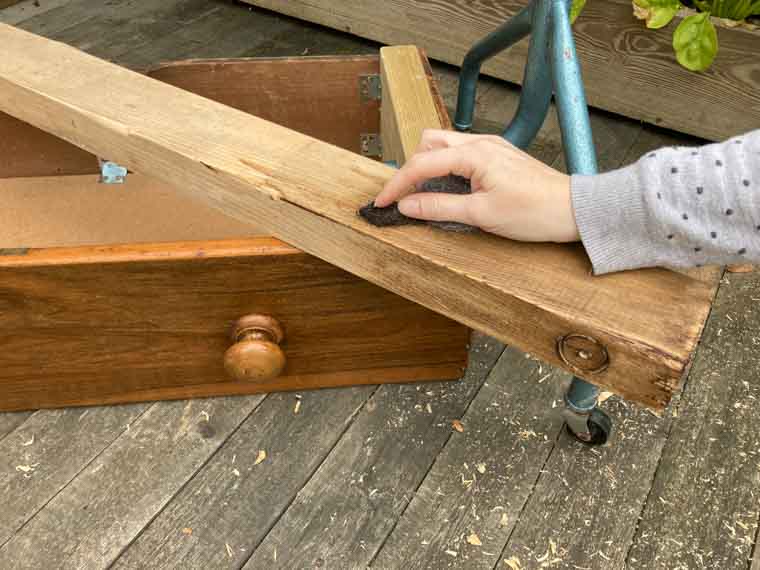
Sand the timber to make it smooth and then stain it to match the planter/drawer. Alternatively, you can paint the entire planter and frame to coordinate with each other. Make sure you use paint that is suitable for use on outdoor projects and prime the metal hanging rail before painting, if needed.
Step 5
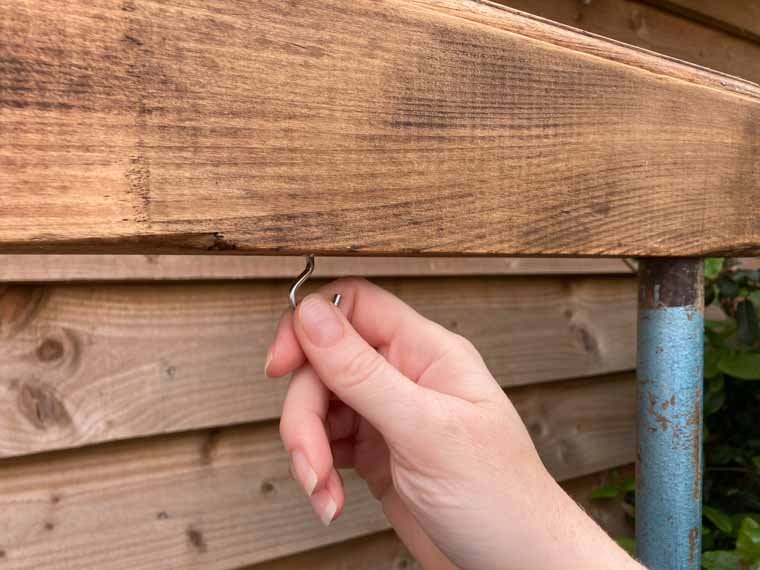
Use the tank cutter to make half-depth holes in underside of the top piece of wood so that the uprights can slot into it. Screw in some eye hooks where you plan to add strings or wires to support the plants.
Step 6
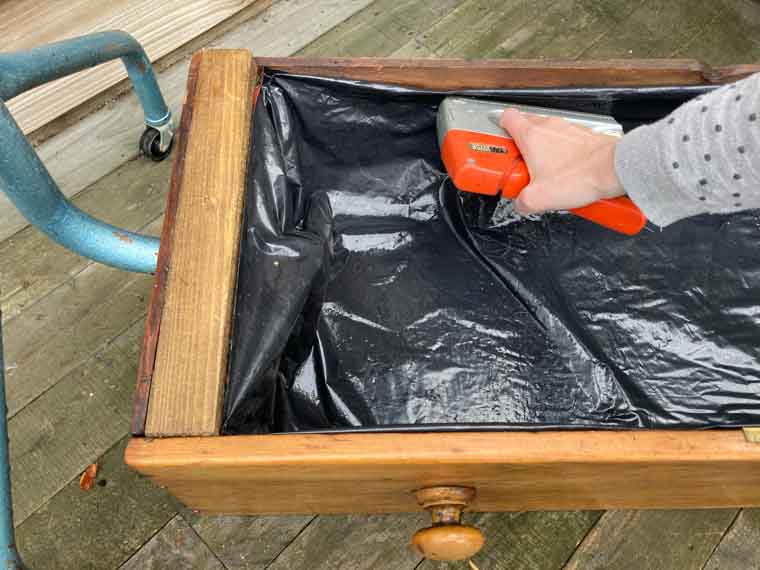
Use an empty compost bag to line the inside of the planter covering the edges of the rail where it has been pushed through into the drawer. Staple it around the edges and use a drill to make drainage holes through the liner and planter.
Step 7
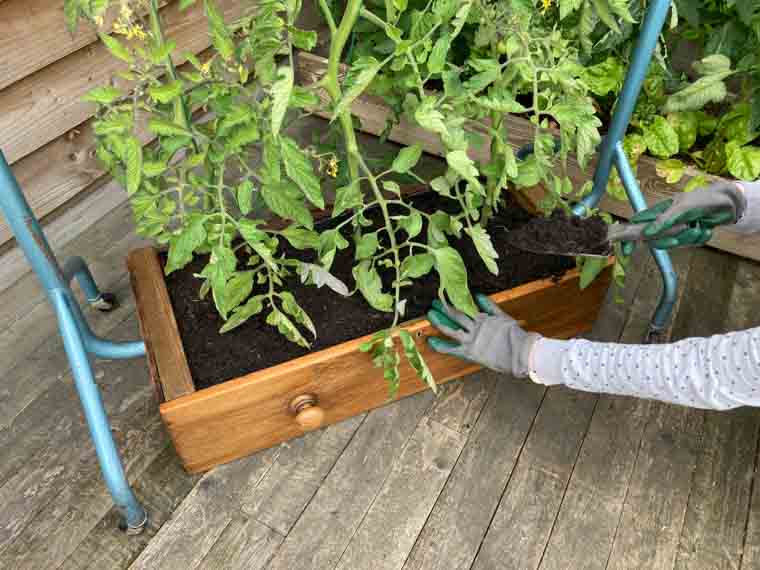
Fill with compost and plant up with tomatoes, beans, peas or even grape vines! Wind the plants around the supporting strings as they grow taller.
.JPG.aspx)
Ta-da! Not only have you created a handy planter by upcycling old items, but it also looks rather cool and funky in your garden too. The frame makes it easier to grow climbing plants without damaging a wall or fence, so you could even use this planter for decorative climbers (such as clematis or Jasmine) instead of veg, and create a living privacy screen on your patio. Or simply plant it up with fruit and vegetables and enjoy picking fresh produce from your kitchen garden!
Project by Cassiefairy.com and photography by Andy-Greenacre.co.uk.
Upcycling with Cassie Fairy