DIY living coffee table for your garden

How to turn a shelving unit into a living coffee table for your garden
We teamed up with Cassie Fairy in hopes of inspiring and encouraging people to reduce the amount of waste that ends up in landfill by looking at objects differently to see if they have another use and she's come up with yet another mind-blowingly creative alternative.If you want to make the most of the warm autumn weather, why not take your coffee outside, snuggle up under a blanket and relax beside a living coffee table? This project uses an old display cabinet that has lost its original glass doors and we’ve upcycled the shelves into a planter for the garden.
The addition of some slate tiles means it also doubles up as a coffee table and provides the perfect spot to rest your cup while enjoying the autumnal colours in your garden. We’ve planted up the living coffee table with low succulents and trailing alpine plants that look good all year round, but you could even change your planting display to suit the seasons with winter pansies, spring crocus and summer daisies.
You will need:
- Small shelving unit or cabinet without doors
- Pallet blocks, pressure-treated timber or sturdy screw-on legs.
- Screwdriver and wood screws
- Drill
- Sander and sandpaper
- Outdoor wood paint
- Compost and plants
- Gravel
- Tiles
Step 1
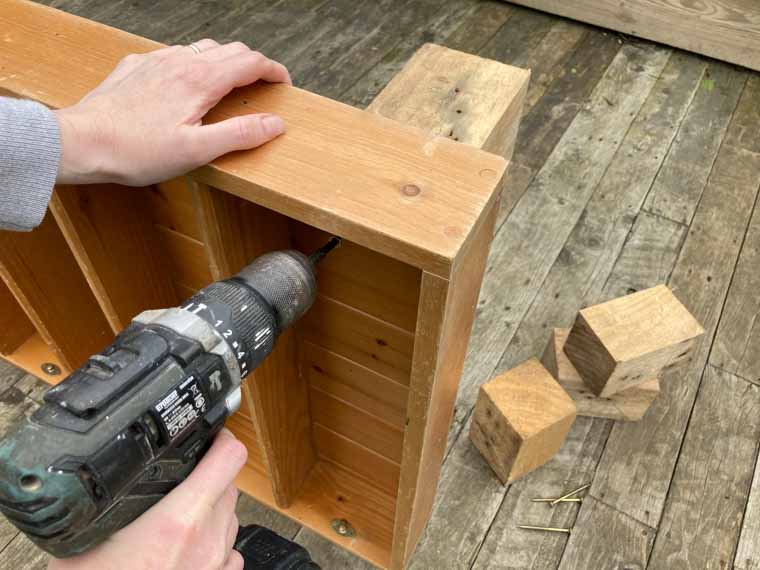
Securely attach some legs to the back of the shelving unit using long wood screws. We’ve used the chunky blocks from a pallet but you could cut down a piece of pressure-treated timber or even add new metal or wooden legs.
Step 2
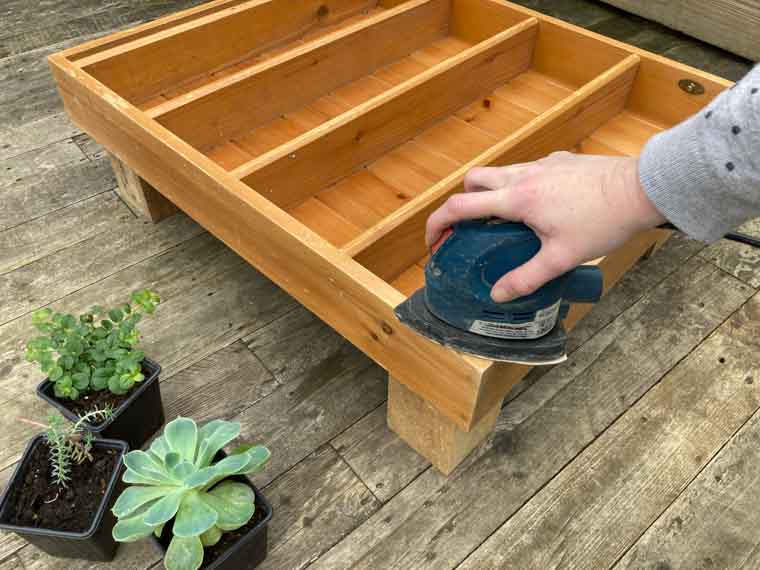
Sand the shelving unit and wooden legs to create a ‘key’ for painting and to remove any splinters.
Step 3
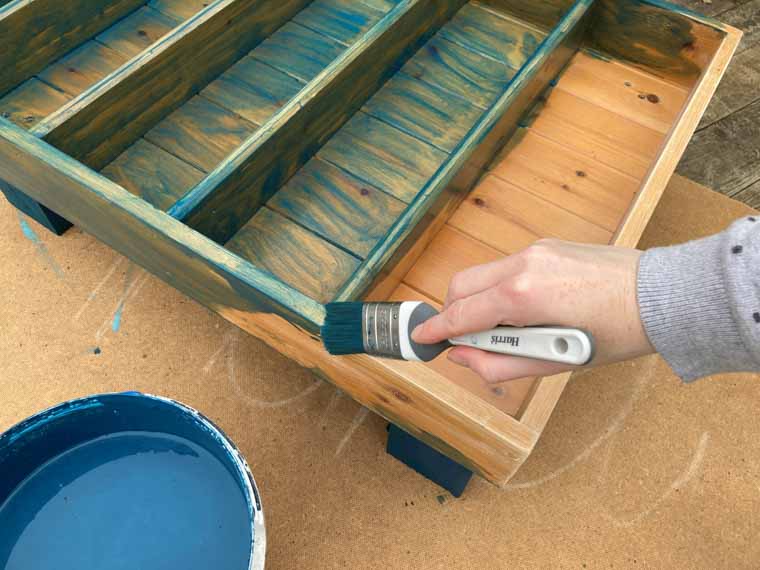
Paint all the surfaces with wood paint that’s suitable for outdoor use. We’ve used bright blue shed treatment and have added two coats to ensure depth of colour. Alternatively, you could apply wood stain or wax to make a feature of the wood grain.
Step 4
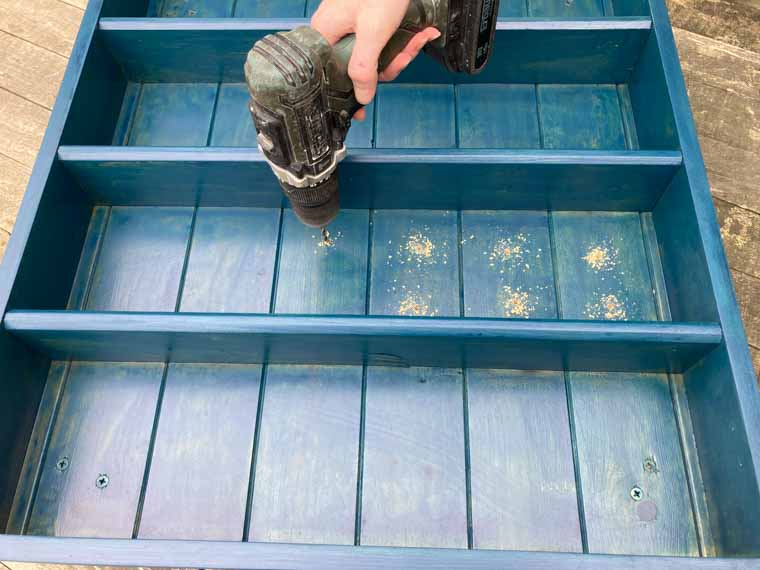
Once the paint is dry, drill some holes into the base of the coffee table. This will help with drainage when it is planted up. Brush out any sawdust created by the drilling process.
Step 5

You can use a hanging basket liner to line inside the shelves or simply add a layer of gravel to aid drainage. Fill with compost and plant up the sections with succulents or alpine plants.
Step 6
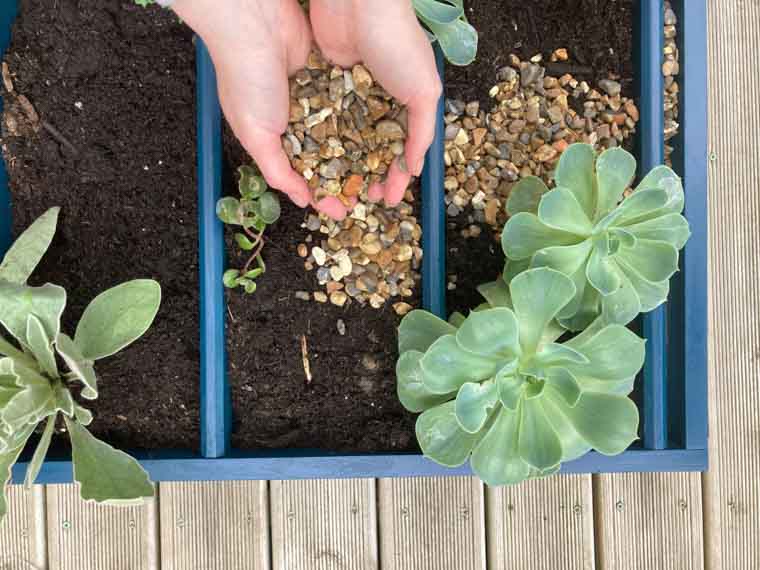
Firm down the plants and backfill with compost before covering it with pea shingle. This creates a neat finish and also helps to prevent minimise the compost from splashing over the tiles and timber if you need to water the plants.
Step 7
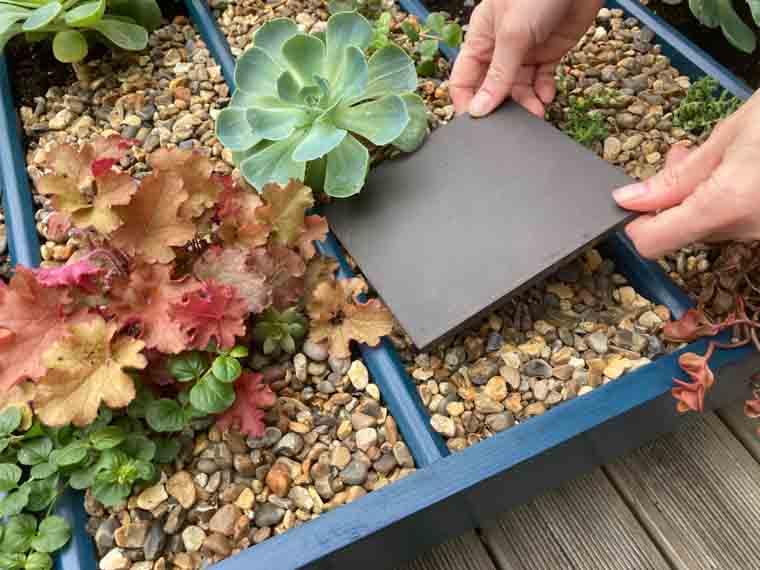
Position tiles onto the gravel as coasters for your coffee cups. We’ve used slate tiles and have positioned them in a rough checkerboard layout but you could create a runner down the centre or just add a couple of tiles at the corners if you prefer.
Top tip
It’s a good idea to move the coffee table into position on your patio or decking before you start planting it up as it will become heavier when you add the gravel, compost and plants.Now all you need to do is put the kettle on, dig out a woolly blanket, light a citronella candle or two, and make the most of those warm autumn evenings outside with an al fresco latte at your new living coffee table.
As with all our projects, please take care while using tools, materials and equipment and all projects on the Safestore blog must be completed at your own risk. We do not take responsibility for any harm or injury that may occur. Be safe!
Project by Cassie Fairy of My Thrifty Life and photography by Andy-Greenacre.co.uk.
Upcycling inspiration