Organize your Christmas Decorations with DIY storage box labels
30 November 2021

Two ways to label plastic storage boxes for the festive season
Whether you want to get organised in advance of the big day, or you want to prevent your Christmas decorations from getting muddled up when you’re putting them away in the new year, this project will help you to label your plastic storage boxes ready for the festive season.These two techniques help you to mark what’s inside the boxes and allow you to change the labels in the future, which is so much more flexible (and cuter!) than using a permanent marker pen on the plastic.
We’ve labelled these storage tubs ready for Christmas but you could use the same techniques to label plastic boxes in your workshop or garage, toy tubs in the kids’ playroom or any storage containers in your utility room.
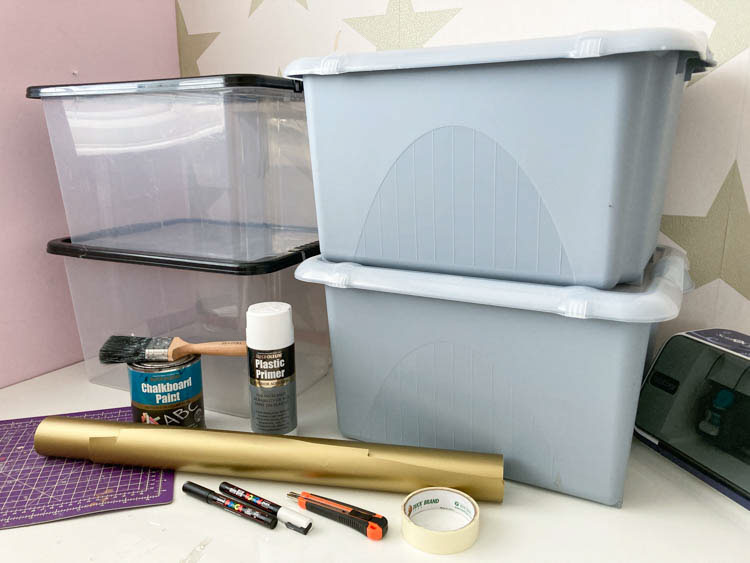
You will need:
- Storage boxes
- Masking tape
- Plastic primer spray paint
- Chalkboard paint
- Paint brush
- Chalk pen
- Self-adhesive vinyl
- Cutting mat and craft knife
Step 1
Make sure the plastic surface is clean and dry before masking off a rectangle shape. Press down the edges of the masking tape to create a crisp line. Then cover over the rest of the box with scrap paper.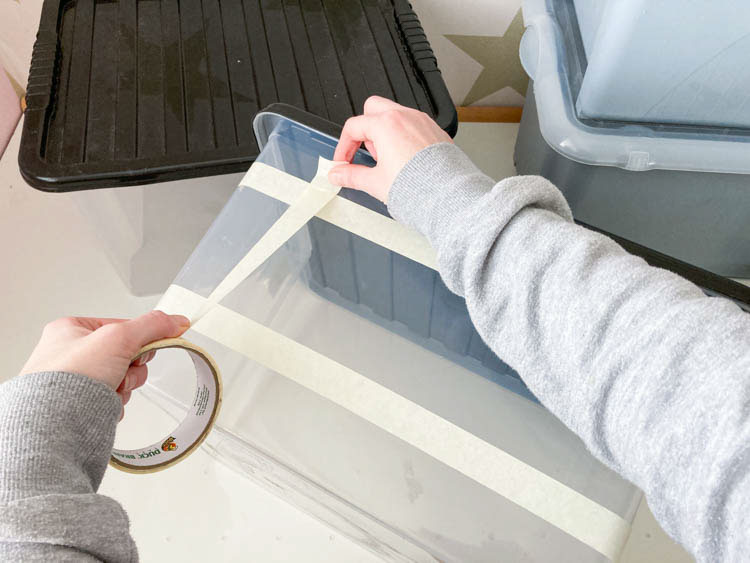
Step 2
Use a plastic primer to paint the rectangle in a contrasting colour. This is especially good for clear plastic boxes as your label will be easier to see without all the contents of the box in the background.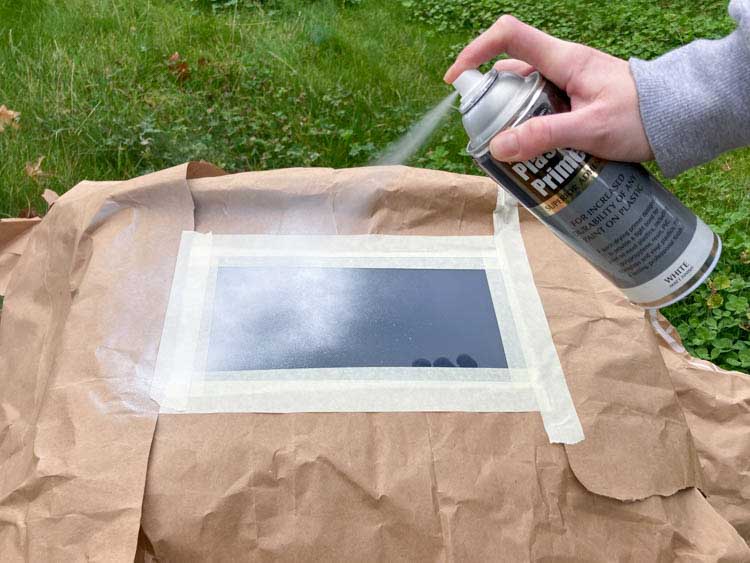
Step 3
Remove the masking tape before the paint dries to get a crisp line around the label.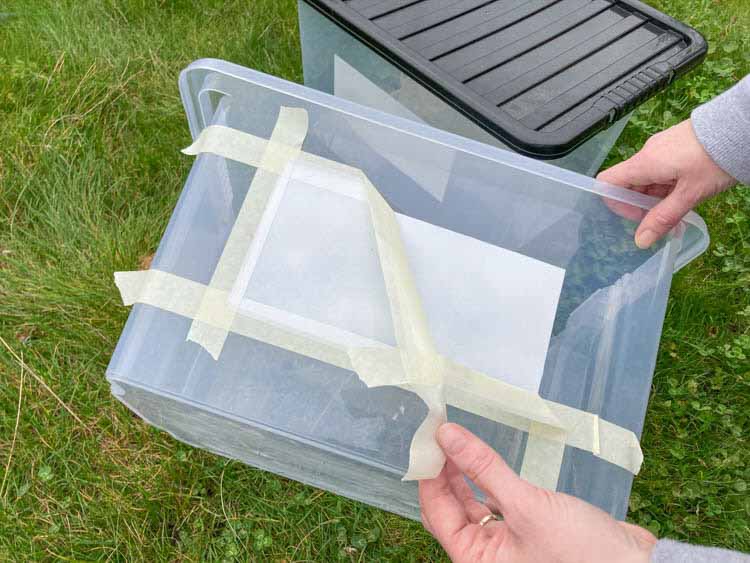
Step 4
Using a wide paint brush, paint a ‘swish’ of chalkboard paint onto the centre of the label. Allow the paint to dry thoroughly.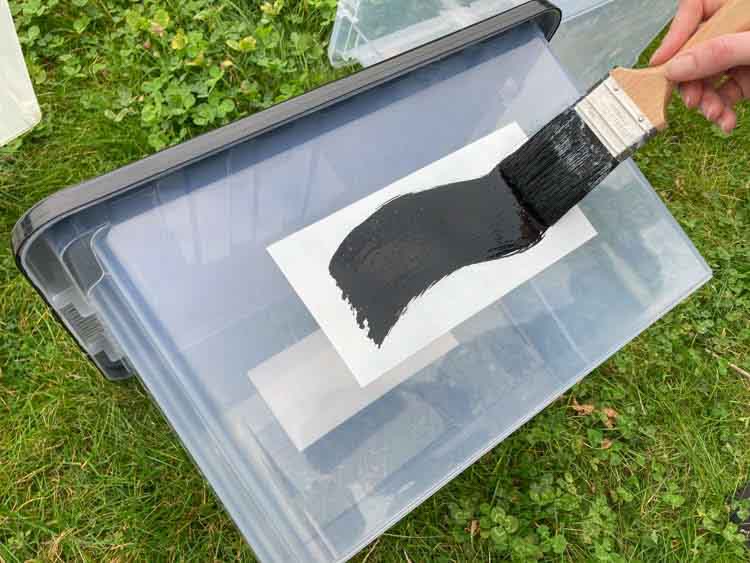
Step 5
You can write any label onto the chalkboard swish using a chalk pen or traditional chalks. We’ve added little festive decorations like holly, baubles and stars in chalk too.
Step 6
Alternatively, you could make a sticky label using self-adhesive vinyl. There are three ways you can cut out the text: either use an electronic cutting machine, or print out the phrase onto paper and tape it onto the surface of the vinyl, then cut out the text with scissors or using a craft knife on a cutting mat. It’s a good idea to use a joined-up font so that all the letters are attached together and you won’t have to position each one individually.
Step 7
Make sure to choose a colour of self-adhesive vinyl that contrasts with the colour of the boxes so that the labels are easy to see – we’ve used gold vinyl on silver tubs. Simply peel off the protective backing and stick the vinyl lettering to your storage boxes.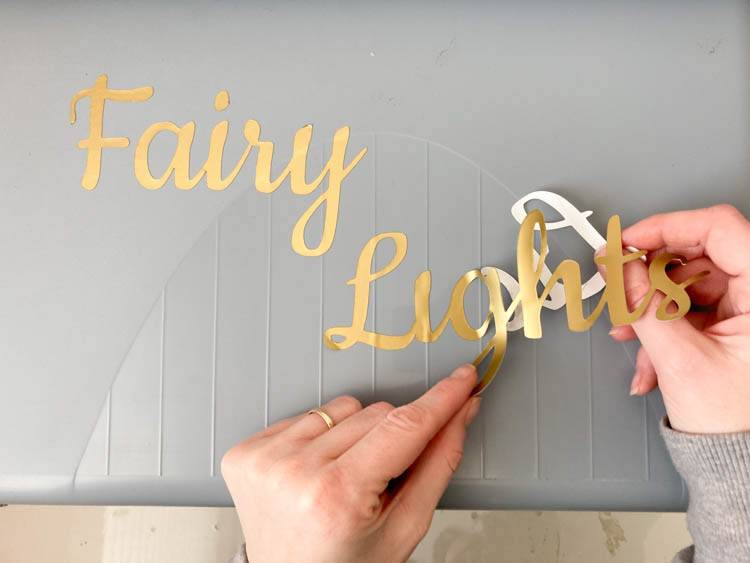
These labelling methods will help you to keep your festive supplies organised or you can use the same techniques to clearly label any plastic storage containers throughout your home. The sticky labels can easily be peeled off and replaced in the future if you decide to change the contents of the storage box. Likewise, the chalk lettering can be simply rubbed off and you can re-write the label on the chalkboard swish whenever you want to re-use the tub for a different purpose. Let’s get organising!
As with all our projects, please take care while using tools, materials and equipment and all projects on the Safestore blog must be completed at your own risk. We do not take responsibility for any harm or injury that may occur. Be safe!
Project by Cassiefairy.com and photography by Andy-Greenacre.co.uk.