Scaffold Board Outdoor Table DIY Project
Make the most of your garden this summer by building an outdoor dining table where all your friends and family can gather for alfresco meals. Upcycle old scaffold boards to create a rustic plank table or leave the metal ends in place for an industrial-style finish.
Scaffold boards are designed to be used outside all year round so they make a great sturdy table top. They can be painted any colour, stained or waxed to match the existing wood finishes in your garden. We already had a teak bench that had silvered with age, so I used a wash of slate grey garden paint to match the aged wood colour while still letting the wood grain show through.
Here a step-by-step guide to turn scaffold boards into an outdoor table of any size:
You will need:
- Scaffold boards
- Pressure treated timber
- Hammer and screwdriver
- Saw
- Electric sander and sandpaper
- Self-drilling screws for wood
- Wood stain or garden paint
Step 1


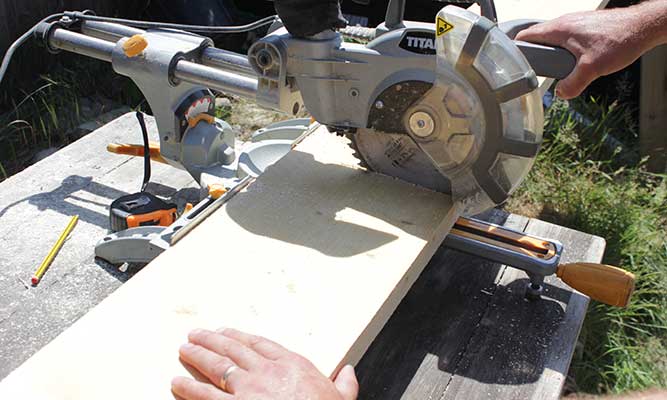
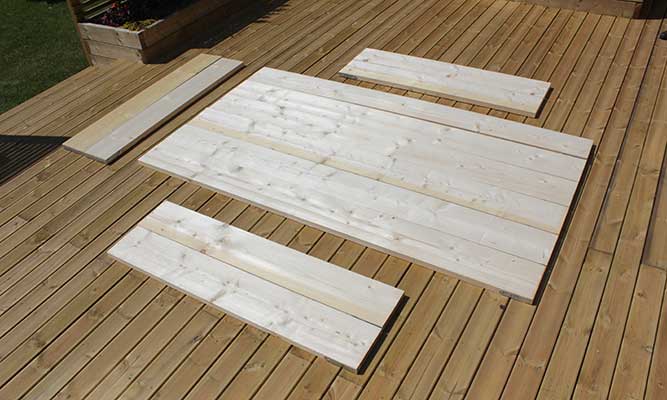
Decide on the length and width of your table. We went big and made an 8ft long table, which is 6 scaffold boards wide, but you might want a smaller table to suit your space. Cut the scaffold boards to the length you’ve chosen. If you don’t want to use the metal ends, you can cut off the end of the planks beyond the metal trim (don’t try to saw through the metal) before measuring and cutting the length. We kept the metal ends in place and cut the planks to 8ft long, which left an offcut of 5ft, which we could later turn into benches.
Step 2
.jpg.aspx)
If you want to have the metal trims at both ends of your table, you’ll need to carefully remove the metal ends from the offcuts to add back onto the cut end of the scaffold boards. Use a flat-head screwdriver and hammer to gently and carefully prise off the metal and remove the nails – this will have spikes on the back so please be very careful when removing it.
Step 3
.jpg.aspx)
Use an electric sander to thoroughly sand down the scaffold boards to remove all rough edges and make it smooth to the touch. Be careful not to use the sander on the metal ends.
Step 4
.jpg.aspx)
Paint the planks on the top and around the edges. Even though the planks will be close together when you turn them into a table top, if you’ve painted the edges it won’t matter if the wood shrinks in the future as it won’t expose unfinished wood. Plus, if you’re keeping the metal ends on the planks, this will cause a couple of millimetres gap anyway so you’ll be able to see the edges.
Step 5
.jpg.aspx)
If you want to keep the metal ends, you can add the extra trims back onto the planks once the paint is dry. Carefully hammer the trim into place, starting in the middle of the cut end of the plank and working your way around the sides, replacing the nails.
Step 6
.jpg.aspx)
Position the planks beside each other, making sure that the ends are flush. Then cut pieces of pressure-treated timber to form a rectangular frame to suit the size of your table. Add an extra beam across the middle for strength and screw the frame together using long self-drilling screws.
Step 7
.jpg.aspx)
Once the frame is constructed, position it onto the planks (with the painted side of the planks facing down) and screw the frame onto the planks. Turn the table top over and add another line of screws into the frame from the top of the table for extra stability.
Step 8
.jpg.aspx)
Use pressure-treated timber to create a frame and legs for the table. Cut two cross-beams to suit the width of your table. Then cut two legs for each beam to the height you wish your table to be - we went for a standard 72cm height dining table. Screw two legs into each cross beam to create two H shape ends. Join these two end pieces with a longer beam in the centre. Finally, add the table top and screw the legs into the inner-edge of the frame on the underside of the planks. Use plenty of long self-drilling screws to ensure that the tabletop and legs frame is firmly and securely fixed together.
This is a low-cost way to create a rustic or industrial-style outdoor table that’s exactly the right size for your family and for the space you have on your patio or deck. You can buy brand new scaffold boards for around £15 each or, if you’re going to be painting or staining the boards anyway, you can buy used scaffold boards for much less. The scaffold board offcuts can be turned into bench seats, or you could use them as shelving in your shed or even indoors!
As with all our projects, please take care while using tools, materials and equipment and don’t take any risks.
By
Cassie Fairy and photography by
Andy Greenacre
*****
The scaffold table should be fine out in the elements over the winter, but if you have garden furniture you would like to store, do get in touch as we have nearly 120 stores nationwide and there is bound to be one near you. Or you can check out more of Cassie Fairy's Upcycling projects here.